Introduction
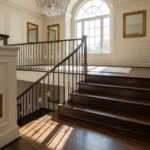
Are your hardwood floors looking dull, worn, or scratched? Bringing back their original shine and beauty might be easier than you think. Refinishing wood floors is a fantastic way to breathe new life into your home, increasing its value and enhancing its aesthetic appeal. This article dives into the world of hardwood floor restoration, exploring whether it’s a manageable DIY project or a task best left to the professionals. We’ll guide you through the assessment process, step-by-step DIY techniques, cost comparisons, potential pitfalls, and, most importantly, how to recognize when it’s time to call in the experts at JRS Flooring Blog. By the end, you’ll have the knowledge to make an informed decision and achieve stunning results.
Summary
-
Assessing Your Hardwood Floors: Is Refinishing the Right Choice?
-
Step-by-Step Guide to Refinishing Wood Floors: A DIY Perspective
-
DIY vs. Professional Refinishing: Cost Comparison and Budgeting
-
Potential Pitfalls and Challenges of DIY Hardwood Floor Refinishing
-
When to Call a Professional: Recognizing the Limits of DIY Refinishing
Assessing Your Hardwood Floors: Is Refinishing the Right Choice?
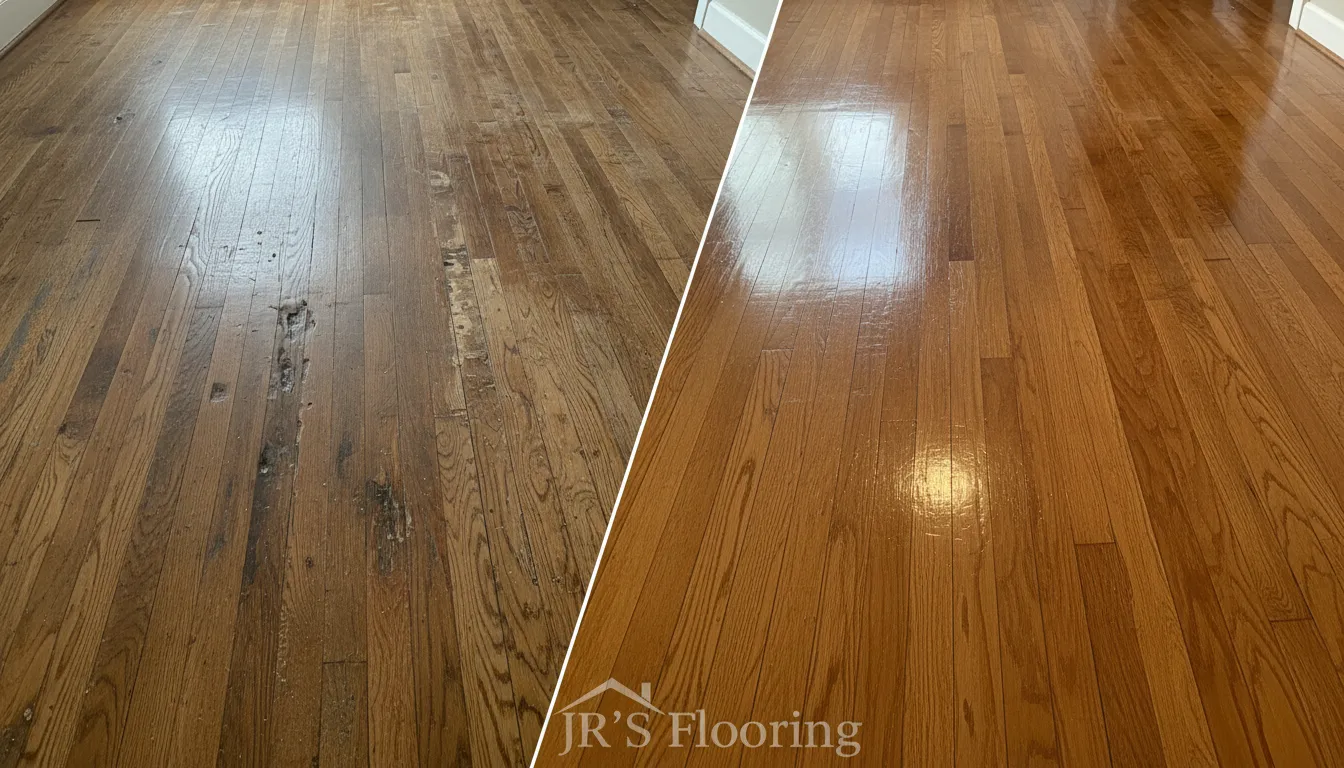
Before diving into a full refinishing project, take a moment to thoroughly assess the state of your hardwood floors. This crucial step will determine if it’s the right solution or if alternative options, like simple cleaning or spot repairs, might suffice. A careful inspection can save you time, money, and unnecessary effort. Consider the overall condition, the type of damage present, and the age of the flooring to make an informed decision.
Start by examining the surface for signs of wear and tear. Minor scratches and scuffs are common in high-traffic areas and may be easily addressed with a light buffing and a new coat of finish. However, deeper scratches, gouges, or stains that penetrate the wood’s surface often indicate the need for more extensive measures. Pay close attention to areas near doorways, hallways, and under furniture, as these are typically the most affected.
Next, check for signs of water damage. Water stains, cupping (where the edges of the boards are higher than the center), or warping are all red flags. If water damage is present, determine the extent of the damage. Small, isolated incidents might be repairable, but widespread water damage could necessitate a full floor replacement. Furthermore, look for loose or damaged boards. These can often be repaired or replaced individually, but a large number of affected boards could suggest a larger problem.
Consider the number of times your floors have been refinished in the past. Solid hardwood floors can typically be sanded and refinished multiple times, but engineered hardwood has a thinner veneer and can only withstand a limited number of sandings, sometimes only once or twice. If the veneer is already thin, further sanding could damage the floor beyond repair. To help you decide if the analysis is right for you, consider these factors:
-
Type of Wood: Determine if you have solid or engineered hardwood.
-
Damage Severity: Assess the depth and extent of scratches, dents, and stains.
-
Water Damage: Identify any signs of moisture damage, such as cupping or warping.
-
Previous Refinishing: Determine how many times the floors have been sanded before.
-
Budget: Consider the cost of materials and labor versus replacement.
By carefully evaluating these factors, you can determine whether this analysis is the most appropriate solution for restoring the beauty and extending the lifespan of your JRS Flooring Blog hardwood floors.
Step-by-Step Guide to Refinishing Wood Floors: A DIY Perspective
Embarking on a DIY journey to restore your hardwood floors can be rewarding. This process, while labor-intensive, allows for significant cost savings and a personalized touch. Before diving in, proper planning and preparation are essential. Start by thoroughly cleaning the area, removing all furniture, rugs, and obstacles. Ensure adequate ventilation by opening windows and using fans. Safety is paramount, so invest in appropriate personal protective equipment, including a respirator mask, safety glasses, and ear protection.
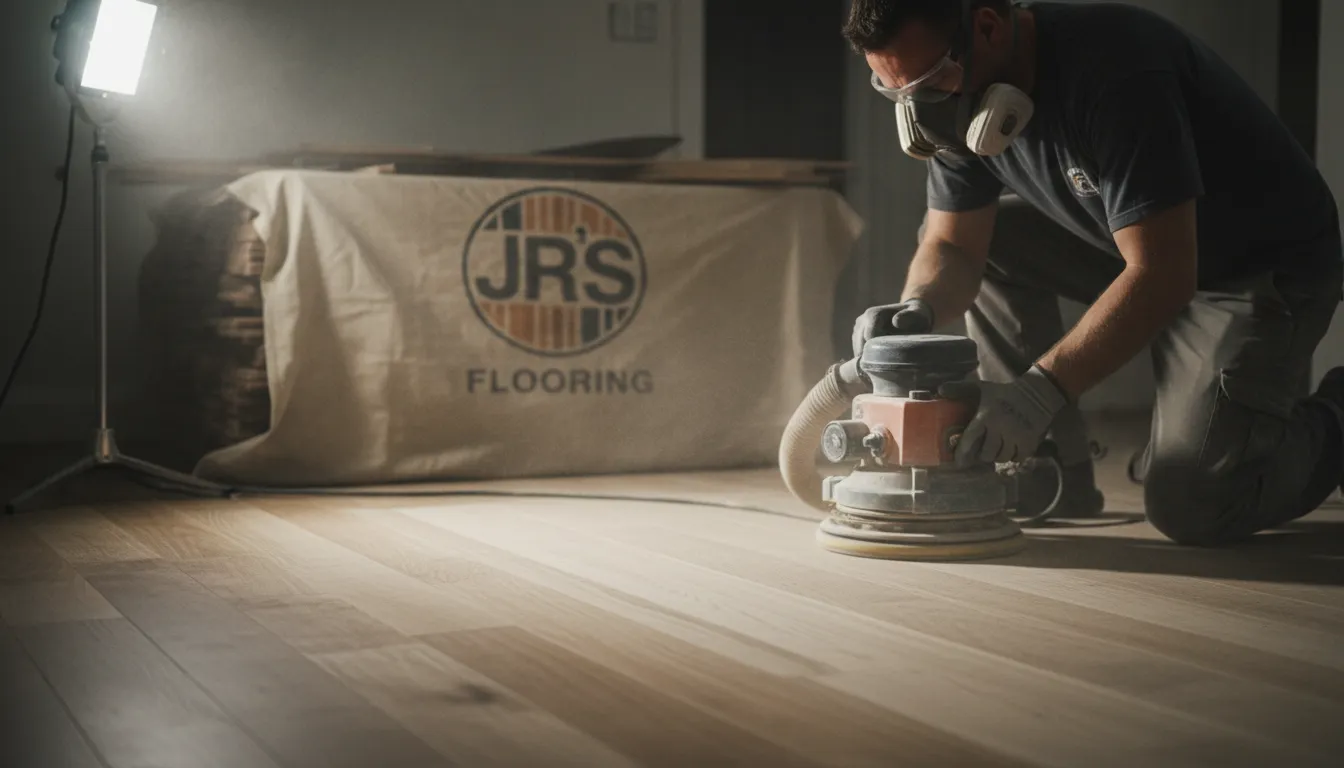
Step 1: Assessment and Preparation. Carefully inspect your floors for any damage, such as loose boards or protruding nails. Make necessary repairs before proceeding. Countersink any nails and secure loose boards. Next, determine the type of finish currently on your floors, as this will influence your sanding approach. Rent a drum sander and an edge sander from a reputable tool rental company. Gather all necessary sanding grits, typically ranging from coarse (36-grit) to fine (100-grit or higher).
Step 2: Sanding. Begin with the coarse-grit sandpaper to remove the old finish and level the floor. Overlap each pass by about 50% to avoid creating ridges. Follow with medium-grit sandpaper to smooth out the scratches left by the coarse grit. Finally, use fine-grit sandpaper for a polished surface. Use the edge sander to reach areas that the drum sander cannot, such as along walls and in corners. Remember to frequently empty the dust bag on the sander to maintain optimal performance. JRS Flooring Blog recommends taking your time to avoid damaging the floor.
Step 3: Cleaning and Finishing. After sanding, thoroughly vacuum the entire area to remove all dust particles. Then, use a tack cloth to wipe down the floors, ensuring a completely clean surface. Apply your chosen stain, if desired, following the manufacturer’s instructions. Allow the stain to dry completely before applying a polyurethane finish. Apply multiple coats of polyurethane, allowing each coat to dry fully and lightly sanding between coats for a smooth, durable finish. With careful execution, this job can bring new life to your home’s hardwood floors.
DIY vs. Professional Refinishing: Cost Comparison and Budgeting
When considering whether to tackle hardwood floor restoration as a DIY project or hire professionals, a crucial factor is the cost. A DIY approach appears cheaper upfront, but a comprehensive cost analysis reveals a more nuanced picture. DIY expenses typically include renting a drum sander (approximately $50-$100 per day), purchasing sandpaper of varying grits ($50-$100), buying wood stain and polyurethane ($50-$150), and investing in safety gear like masks and eye protection ($20-$50). Unexpected costs, such as replacing damaged boards or dealing with unforeseen issues, can quickly inflate a DIY budget. According to the JRS Flooring Blog, proper safety measures and high-quality materials are essential, regardless of the chosen route.
Professional refinishing services offer a more predictable cost structure, albeit at a higher initial price. Professionals factor in labor, material, and equipment costs, usually providing a comprehensive quote. The price range typically falls between $3 to $8 per square foot, depending on the project’s complexity and the finish quality. While this seems pricier than DIY, it encompasses expertise, specialized equipment, and, crucially, insurance coverage for potential damages. Consider also the time saved, as professionals complete the job far quicker and often with superior results.
Budgeting for either option requires careful planning. For DIY, create a detailed list of materials and rental fees, adding a contingency fund for unexpected repairs or mistakes. This analysis should include costs such as: sand paper, wood filler, safety equipment, floor cleaner, and applicators. For professional work, obtain multiple quotes, scrutinizing what each includes (e.g., moving furniture, disposal of waste). Verify if the quote covers subfloor repairs or additional coats of finish. Comparing quotes side-by-side allows for informed decision-making.
Ultimately, the choice hinges on your budget, skill level, and time availability. The option to hire professionals offers peace of mind and quality assurance, making it a worthwhile investment for those prioritizing convenience and expertise. The potential for errors in a DIY scenario could actually cost more in the long run to fix.
Potential Pitfalls and Challenges of DIY Hardwood Floor Refinishing
Embarking on a DIY hardwood floor project can be rewarding, but it’s crucial to be aware of the potential pitfalls. Many homeowners underestimate the complexity involved, leading to unsatisfactory results or even damage to their floors. Understanding these challenges upfront can help you make an informed decision about whether to tackle the project yourself or hire professionals, such as JRS Flooring Blog.
One of the most common issues is improper sanding. If not done correctly, sanding can leave swirl marks, uneven surfaces, or remove too much material, potentially ruining the floor. Knowing the correct grit sequence and applying even pressure are essential skills. Renting the wrong type of sander or failing to maintain it properly can also lead to problems. This process requires a delicate balance of power and finesse that comes with experience.
Staining and finishing present their own set of challenges. Achieving a uniform color can be difficult, especially on older floors or those with variations in wood grain. Applying too much stain, not wiping it off properly, or using incompatible products can result in blotchy or uneven finishes. Furthermore, the fumes from stains and finishes can be harmful, requiring proper ventilation and safety precautions. At JRS Flooring Blog, we know that a quality finish requires a good product and a steady hand.
Dust control is another significant consideration. Sanding generates a large amount of fine dust that can spread throughout your home if not properly contained. Investing in a high-quality dust containment system or taking the time to seal off rooms is crucial. Cleaning up the dust afterward can also be a time-consuming and arduous task. Without adequate measures, the dust can affect air quality and settle on furniture and belongings.
GET A FREE, NO-OBLIGATION ESTIMATERequest Free quote |
Finally, consider the time commitment and physical demands of this undertaking. Restoring wood floors is a labor-intensive process that can take several days, or even weeks, depending on the size of the area and the complexity of the job. It requires a lot of bending, kneeling, and heavy lifting, which can be physically taxing. If you have any physical limitations or a busy schedule, it may be more practical to hire professionals. The team at JRS Flooring Blog knows what it takes.
When to Call a Professional: Recognizing the Limits of DIY Refinishing
While DIY restoring wood floors can be a rewarding endeavor, it’s crucial to recognize when the project demands professional expertise. Attempting to tackle complex issues without the necessary skills and equipment can lead to costly mistakes and unsatisfactory results. Understanding the limitations of DIY and identifying situations where a professional is essential will save you time, money, and frustration.
One clear indicator is the extent of damage. Minor scratches and surface imperfections are usually manageable with DIY methods. However, if your hardwood floors have deep gouges, water damage, significant warping, or are severely discolored, professional intervention is highly recommended. These issues often require specialized equipment and techniques to properly address and restore the floor’s integrity. Trying to fix these problems yourself could exacerbate the damage.
Another factor to consider is your experience level. If you’ve never tackled a similar project before, starting with a large and complex floor work might not be the best approach. Professionals have years of experience and a deep understanding of different wood types, finishes, and techniques. They can quickly assess the condition of your floors and recommend the most appropriate course of action. Consider these points before starting:
-
Extensive Damage: Deep scratches, gouges, or water damage.
-
Unevenness: Significant warping or cupping of the floorboards.
-
Large Area: Refinishing multiple rooms or a large open space.
-
Unknown Wood Type: Difficulty identifying the type of wood.
-
Lack of Experience: No prior experience with floor restoration projects.
-
Time Constraints: Limited time to dedicate to the project.
Furthermore, certain types of finishes and stains can be difficult to work with and may require specialized equipment. For example, applying a polyurethane finish evenly requires a steady hand and the right application tools. Improper application can result in streaks, bubbles, or an uneven sheen. If you’re unsure about which products to use or how to apply them properly, consulting with a professional at JR’S Flooring is a wise decision. This ensures a flawless finish and protects your investment. Remember, a professional assessment can prevent costly errors.
Finally, consider the time commitment involved. Fixing floors is a labor-intensive process that can take several days or even weeks, depending on the size of the area and the complexity of the job. If you have a busy schedule or simply don’t have the time to dedicate to the project, hiring a professional might be the best option. It allows you to enjoy beautiful, restored floors without disrupting your daily routine. A professional from JRS Flooring Blog will handle every aspect of it efficiently.
Conclusion
Deciding whether to restore your hardwood floors yourself or hire a professional involves careful consideration of your skills, budget, and time constraints. From assessing the condition of your floors to understanding the potential pitfalls of DIY projects, this guide has equipped you with the knowledge to make an informed choice. Remember, proper preparation, meticulous execution, and realistic expectations are key to achieving a successful outcome. Weigh the costs and benefits of each approach, and don’t hesitate to seek professional advice when needed.
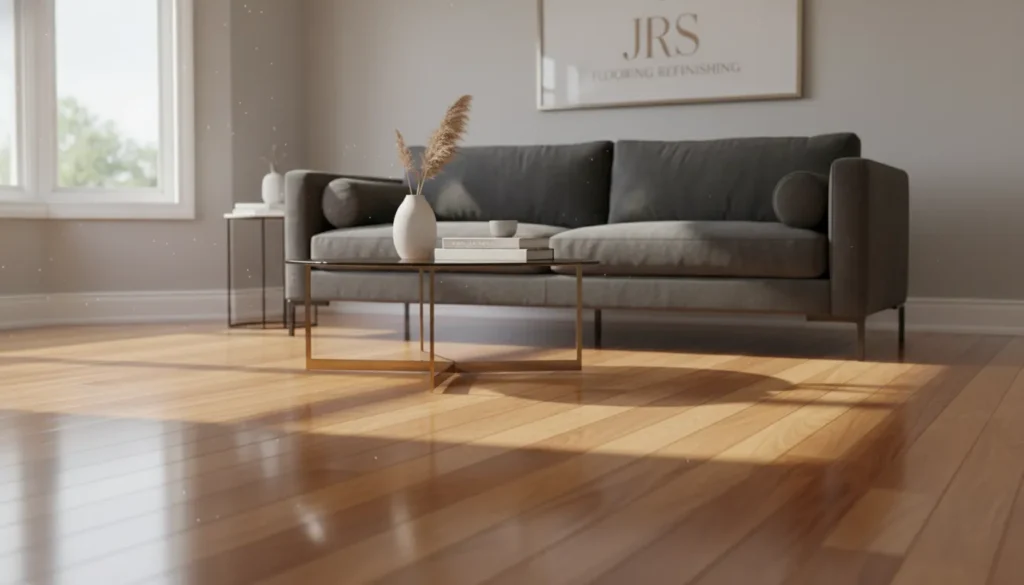
Whether you opt for the hands-on approach of DIY or the expertise of professionals, the goal remains the same: to restore the beauty and extend the life of your hardwood floors. At JRS Flooring Blog, we understand the importance of quality craftsmanship and lasting results. If you’re in the Tri-State area (NY, NJ, and PA) and considering professional restoration, contact us for a consultation. Our team of experienced professionals is dedicated to providing top-notch service and exceeding your expectations. Consider JR’s Flooring for all your needs in hardwood installation, expert refinishing, and modern flooring solutions. When considering refinishing wood floors, JRS Flooring Blog is here to help. Transform your home with JR’s Flooring, where quality and customer satisfaction are our top priorities.
Frequently Asked Questions
How do I assess if my hardwood floors are suitable for refinishing?
Before starting, evaluate the condition of your floors. Look for minor scratches that can be addressed with light buffing. However, deep scratches, gouges, or stains that penetrate the wood’s surface indicate the need for more extensive measures. Also, check for water damage like stains, cupping, or warping. If water damage is extensive, a full floor replacement might be necessary. Consider how many times your floors have been sanded before, especially with engineered hardwood, which has a thinner veneer and can only withstand a limited number of sandings.
What are the key steps in a DIY approach to refinishing wood floors?
The process begins with thorough cleaning and preparation, including removing furniture and ensuring ventilation. Start by inspecting for damage, like loose boards or protruding nails, and make necessary repairs. Sand the floors using a drum sander and an edge sander, beginning with coarse-grit sandpaper to remove the old finish, followed by medium-grit and fine-grit sandpaper for a smooth surface. After sanding, vacuum the area thoroughly and use a tack cloth to ensure a clean surface. Finally, apply stain (if desired) and multiple coats of polyurethane, allowing each coat to dry fully.
What are the potential cost differences between DIY and professional **Refinishing wood floors**?
A DIY approach may seem cheaper initially, but costs can add up. DIY expenses include renting a drum sander, purchasing sandpaper, wood stain, polyurethane, and safety gear. Unexpected costs, like replacing damaged boards, can inflate the budget. Professional services offer a more predictable cost, typically ranging from $3 to $8 per square foot, which includes labor, material, equipment, and insurance coverage. While pricier, it encompasses expertise and specialized equipment, potentially saving time and ensuring superior results.
What are some common pitfalls to avoid when refinishing wood floors myself?
One common issue is improper sanding, which can leave swirl marks or uneven surfaces. Staining and finishing can also be challenging; achieving a uniform color, especially on older floors, can be difficult, and fumes from stains and finishes can be harmful. Dust control is another significant consideration, as sanding generates fine dust that can spread throughout your home. It’s important to invest in a dust containment system and take the time to seal off rooms.
When is it best to call a professional for **Refinishing wood floors**?
It’s crucial to recognize when the project demands professional expertise. If your hardwood floors have deep gouges, water damage, significant warping, or are severely discolored, professional intervention is highly recommended. These issues often require specialized equipment and techniques to properly address and restore the floor’s integrity. Also, if you lack experience with similar projects, starting with a large, complex project may not be the best approach. Professionals can quickly assess the condition of your floors and recommend the most appropriate course of action.