
Introduction
Dreaming of a beautiful, new floor without breaking the bank? Laminate flooring offers an affordable and stylish solution for homeowners looking to upgrade their space. In this comprehensive guide about laminate floor installation, we provide you with everything you need to know for a successful installation, from preparing the subfloor to achieving those perfect, clean cuts. Whether you’re a seasoned DIY enthusiast or a first-time home improver, this step-by-step walkthrough will empower you to tackle the project with confidence and achieve professional-looking results. Learn the essential techniques, avoid common pitfalls, and transform your home with a stunning new laminate floor. Let’s dive in and unlock the secrets to a flawless process! The team here at JRS Flooring Blog are excited to share our expertise with you.
Summary
-
Preparing for Laminate Floor Installation: Essential First Steps
-
Cutting Laminate Planks: Achieving Precise Fits and Clean Edges
-
Underlayment Essentials: Choosing the Right Base for Your Laminate Floor
Preparing for Laminate Floor Installation: Essential First Steps
Before diving into the actual installation, several crucial steps need to be taken to ensure a successful and long-lasting result. Proper preparation not only simplifies the process but also prevents potential issues like buckling, uneven surfaces, and premature wear. To that end, this initial phase sets the stage for a professional-looking floor that enhances the beauty and value of your home, as highlighted in the JRS Flooring Blog.
First, acclimatize the laminate flooring. Store the unopened boxes in the room where they will be installed for at least 48 to 72 hours. This allows the material to adjust to the room’s temperature and humidity, minimizing expansion or contraction after installation. This step is critical for preventing gaps and ensuring a snug fit.
Next, thoroughly clean the subfloor. Remove all debris, including dust, dirt, nails, and staples. A clean surface ensures proper adhesion of the underlayment and prevents imperfections from telegraphing through to the finished floor. To that end, consider using a vacuum cleaner and a damp mop for a comprehensive clean.
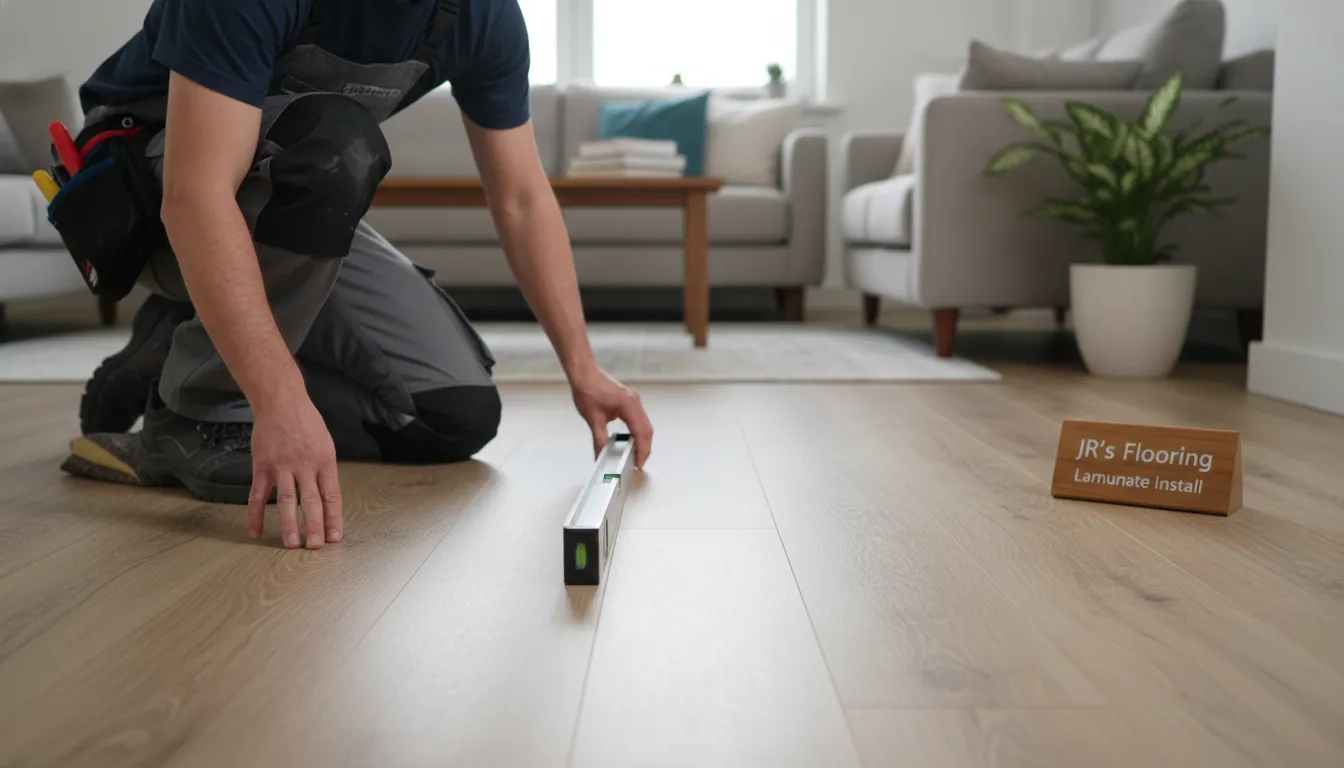
Inspect the subfloor for any imperfections. Addressing any unevenness is essential before proceeding. Use a level to identify high or low spots. In case of minor imperfections, self-leveling compound can be used to create a smooth, even surface. In the event of more significant issues, consult a professional for advice on proper repair techniques.
Install an underlayment. This layer provides cushioning, sound insulation, and moisture protection. Select an underlayment specifically designed for laminate flooring, ensuring it meets the manufacturer’s recommendations. Overlap the seams of the underlayment and tape them securely to prevent moisture from seeping through. As a matter of fact, the JRS Flooring Blog consistently emphasizes the importance of a quality underlayment.
Gather all necessary tools and materials. Having everything readily available will streamline the installation process. Essential items include a tapping block, pull bar, measuring tape, pencil, safety glasses, knee pads, a saw (circular, jig, or miter), and spacers. Proper preparation is key to efficient work, accordingly.
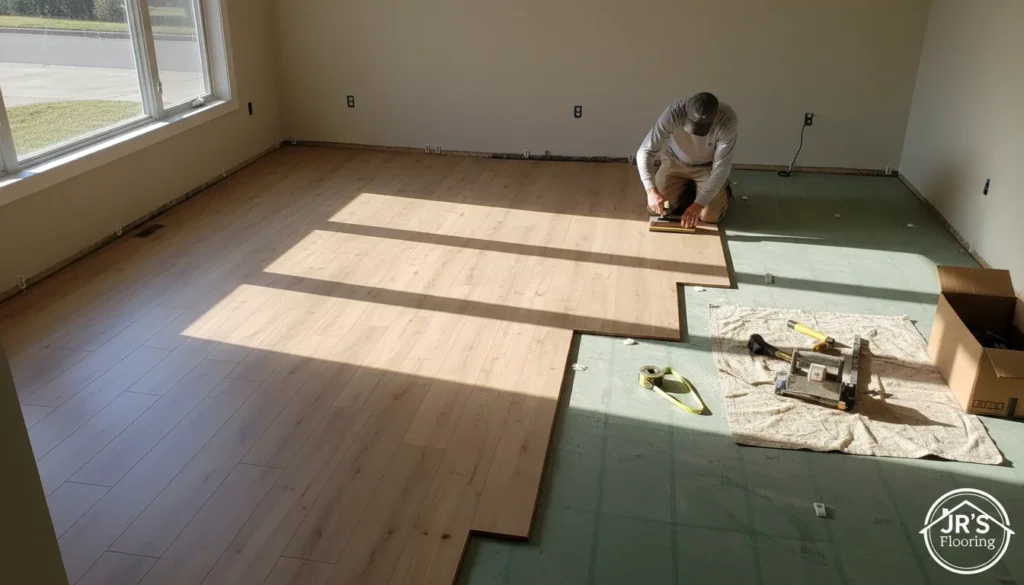
Step-by-Step Laminate Flooring Installation Guide
Embarking on the laminate floor project can significantly enhance the aesthetic appeal of your home. Proper preparation is key to achieving a professional-looking result. Start by acclimating the laminate flooring to the room’s environment for at least 48 to 72 hours. That is to say, this allows the material to adjust to the temperature and humidity levels, preventing warping or buckling after installation. Make sure to store the boxes flat in the room where the flooring will be installed.
Next, thoroughly clean the subfloor, ensuring it is level, dry, and free of any debris. Uneven surfaces can cause the laminate planks to shift or become damaged over time. If necessary, use a leveling compound to correct any imperfections in the subfloor. After cleaning, roll out an underlayment pad. This pad provides a moisture barrier, reduces noise, and adds cushioning underfoot. Overlap seams by a few inches and tape them together using moisture-resistant tape. Likewise, ensure that the subfloor is prepared well before installing the pad.
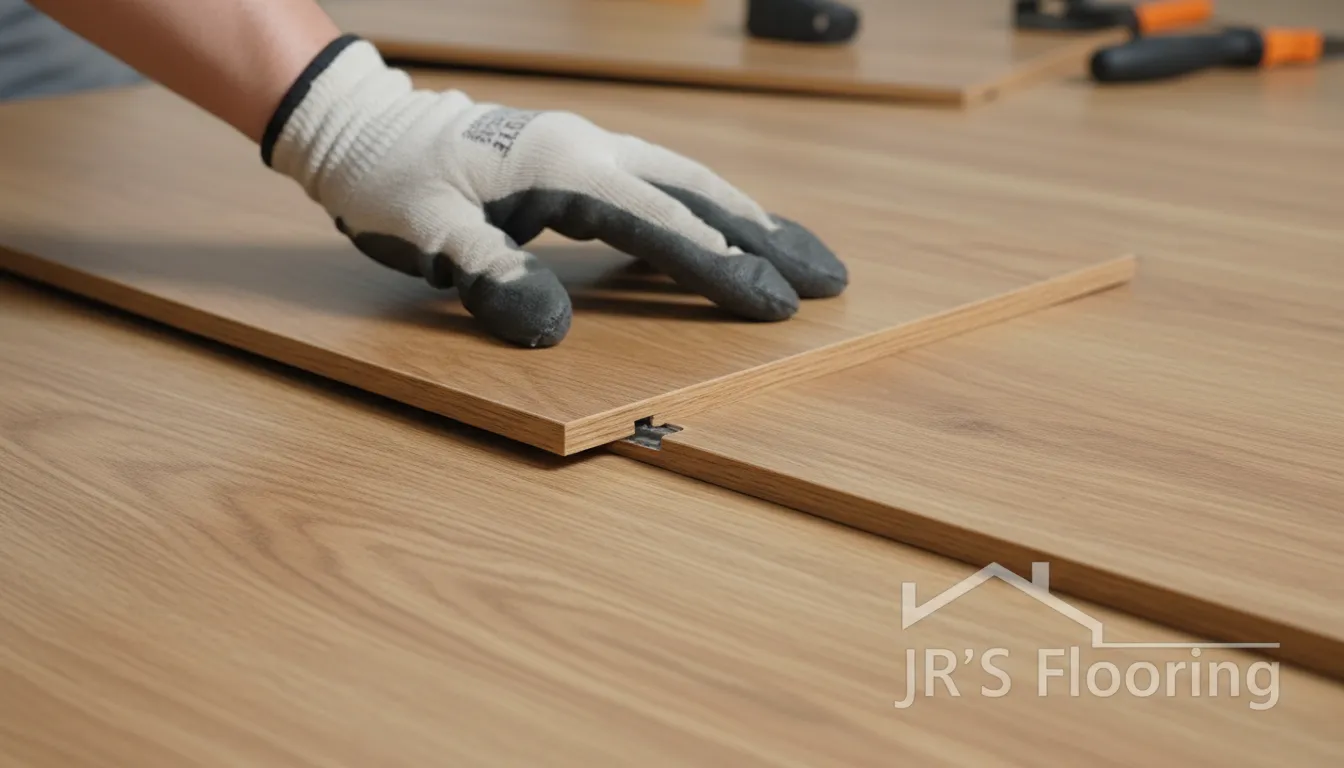
Begin the actual process along the longest straight wall in the room, leaving a quarter-inch expansion gap between the wall and the first row of planks. Use spacers to maintain this gap consistently along the wall. This gap allows for natural expansion and contraction of the flooring due to temperature and humidity changes. Connect the first row of planks end-to-end, using the tongue-and-groove system. Ensure that the seams are tightly locked together to prevent any gaps. Continue laying rows, staggering the end joints for a more visually appealing and structurally sound floor. For this purpose, stagger the joints to increase strength.
When you reach the final row, you’ll likely need to cut the planks to fit the remaining space. Measure the distance between the last full row and the wall, remembering to account for the expansion gap. Use a saw to cut the planks to the required width, and install them as you did with the previous rows. For doorways and other tight spaces, use a jigsaw to make precise cuts, ensuring a snug fit around the obstacles. To that end, make sure every plank fits properly.
Finally, install baseboards or quarter-round molding to cover the expansion gaps along the walls. This will give your floor a clean, finished look and protect the edges of the laminate from damage. Inspect the entire floor for any imperfections or gaps, and make any necessary adjustments. With careful preparation and attention to detail, this can provide a beautiful and durable flooring solution for years to come. For more tips and guides, visit the JRS Flooring Blog.
Cutting Laminate Planks: Achieving Precise Fits and Clean Edges
Achieving a professional-looking floor depends heavily on the precision of your cuts. Clean edges and accurate dimensions are crucial for seamless joins and a flawless final appearance. This section details the tools and techniques needed to cut laminate planks effectively, minimizing errors and waste. Therefore, precise cuts are essential.
Essential Tools for Cutting: A variety of tools can be used, each with its own strengths. For straight cuts, a circular saw or a table saw equipped with a fine-tooth blade designed for laminate is ideal. Jigsaws are invaluable for intricate cuts and curves around door frames or pipes. A laminate cutter offers a dust-free option for straight cuts. Measuring tools like a tape measure and a square are also essential for accurate marking. Safety glasses and a dust mask are non-negotiable for personal protection during the cutting process. Correspondingly, tools are paramount for safety and precision.
Techniques for Clean Cuts: To prevent chipping, always cut with the decorative side facing up when using a jigsaw, and facing down when using a circular saw. Applying painter’s tape along the cut line can also minimize splintering. Score the cut line with a utility knife before sawing; this creates a cleaner edge. When using a power saw, maintain a steady feed rate; forcing the saw can cause the laminate to chip or crack. Support the plank adequately to prevent vibration, which can also lead to imperfections in the cut. Moreover, appropriate techniques help avoid defects.
Cutting Intricate Shapes and Curves: When dealing with irregular shapes, create a template using cardboard or heavy paper. Trace the template onto the laminate plank and use a jigsaw with a fine-tooth blade to follow the lines carefully. Take your time and make multiple passes if needed, rather than trying to cut through the entire thickness at once. Sand the edges lightly after cutting to remove any rough spots or splinters. Similarly, templates improve accuracy for complex cuts.
Troubleshooting Common Cutting Issues: Chipping is a frequent problem; ensure you’re using a sharp, fine-tooth blade and the correct cutting technique. Uneven cuts can result from a warped blade or inconsistent pressure. Always inspect your tools before starting and adjust your technique as needed. If you encounter significant chipping, consider using a router with a flush-trim bit to clean up the edges. Remember, practice makes perfect, so don’t be afraid to test your cutting skills on scrap pieces first. Check out JRS Flooring Blog for visual guides. Nevertheless, address issues to achieve a perfect result.
Underlayment Essentials: Choosing the Right Base for Your Laminate Floor
Selecting the right underlayment is a critical step before starting any floor project. It acts as a crucial interface between the subfloor and your new flooring, providing a range of benefits that contribute to the overall performance and longevity of the floor. The underlayment choice significantly impacts the comfort, sound insulation, and moisture resistance of your final product. JRS Flooring Blog emphasizes the importance of considering specific room conditions and the manufacturer’s recommendations when making this decision. With this in mind, select wisely.
One of the primary functions of underlayment is to cushion the floor, making it more comfortable to walk on. It also helps to reduce noise transmission, particularly in multi-story homes. Furthermore, many underlayments include a moisture barrier, which protects the laminate from moisture seeping up from the subfloor. This is especially important in basements or areas with high humidity. Ignoring this aspect can lead to warping, mold growth, and premature failure of the laminate. In that case, moisture resistance is very important.
There are several types of underlayment available, each with its own set of properties. Foam underlayment is a popular choice for its affordability and ease of installation. Cork underlayment offers excellent sound insulation and is a sustainable option. Combination underlayments include a moisture barrier and are suitable for areas prone to dampness. When evaluating your options, consider these key factors:
GET A FREE, NO-OBLIGATION ESTIMATERequest Free quote |
-
Thickness: Thicker underlayments generally provide better cushioning and sound insulation.
-
Moisture Resistance: Essential for basements and bathrooms.
-
Sound Rating (IIC): Indicates the level of sound insulation.
-
Material: Foam, cork, rubber, and combination options are available.
-
Subfloor Compatibility: Ensure the underlayment is suitable for your subfloor type (concrete, wood, etc.).
Proper installation of the underlayment is as important as selecting the right type. Ensure the subfloor is clean, level, and dry before laying the underlayment. Follow the manufacturer’s instructions for installation, paying close attention to overlapping seams and securing it in place. A well-installed underlayment will provide a stable and protective base, ensuring the beauty and durability of your new laminate floor for years to come. A proper selection during this audit can prevent costly repairs later. Notably, correct installation is critical.
Post-Installation Care and Maintenance for Laminate Floors
Proper care and maintenance are crucial for extending the life and preserving the appearance of your laminate floors. Unlike hardwood, laminate is more resistant to scratches and dents, but it still requires regular attention to keep it looking its best. Establishing a consistent cleaning routine and taking preventative measures will help maintain its beauty for years to come. Remember, investing a little time in upkeep now can save you from costly repairs or replacements down the road. JRS Flooring Blog recommends following these guidelines for optimal results. In this case, preventive actions are preferred.
Regular Cleaning: Sweep, dust, or vacuum your laminate floors regularly to remove dirt, dust, and debris. Use a soft-bristled broom, a microfiber mop, or a vacuum cleaner with a soft floor attachment to avoid scratching the surface. Pay special attention to high-traffic areas, where dirt and grime can accumulate quickly. Clean up spills immediately with a damp cloth to prevent staining. Avoid using excessive water, as it can seep into the seams and damage the core of the planks. Always wring out the cloth thoroughly before wiping the floor. Moreover, prevent water from accumulating on the floor.
Choosing the Right Cleaning Products: Use cleaning products specifically designed for laminate floors. Avoid using abrasive cleaners, scouring powders, or bleach, as they can damage the surface and dull the finish. Look for pH-neutral cleaners that are gentle yet effective at removing dirt and grime. You can also make your own cleaning solution by mixing a small amount of mild dish soap with water. Always test the cleaning product in an inconspicuous area first to ensure it doesn’t damage the floor. Never use steam cleaners on laminate floors, as the heat and moisture can cause warping and swelling. For this reason, use the proper materials.
Preventative Measures: Place mats and rugs at entryways to trap dirt and debris before they can be tracked onto the floor. Use felt pads under furniture legs to prevent scratches and dents. Avoid wearing shoes with high heels or cleats on your floors, as they can damage the surface. Trim your pets’ nails regularly to prevent them from scratching the floors. Consider using a humidifier during the dry winter months to prevent the planks from shrinking and cracking. By taking these preventative measures, you can significantly reduce the amount of wear and tear on your floors. Certainly, caution goes a long way.
Addressing Stains and Scratches: For stubborn stains, try using a laminate floor stain remover or a mixture of baking soda and water. Gently rub the stain with a soft cloth until it disappears. For minor scratches, you can use a laminate repair kit to fill in the damaged area. Follow the instructions carefully and choose a color that matches your floor. For deeper scratches or gouges, you may need to consult a professional flooring contractor. Periodic inspections of the floor’s surface are crucial for maintaining the floor’s integrity. Ultimately, address issues to prolong its life.
Conclusion
Installing laminate flooring can transform the look and feel of your home. By following the steps outlined in this guide, you can achieve a professional-looking result that enhances your living space and increases its value. Remember to prioritize proper preparation, precise cuts, and the selection of the right underlayment to ensure a long-lasting and beautiful floor. Consistent care and maintenance will further extend its lifespan, allowing you to enjoy your new floors for years to come.
From acclimating the planks to fitting the final baseboards, each step contributes to the overall success of the project. Don’t be afraid to take your time, double-check your measurements, and consult with professionals if needed. Consider the JRS Flooring Blog your resource for additional tips and expert advice.
Ready to start your next flooring project? With the right tools, techniques, and a little bit of patience, you can successfully install laminate flooring and create a stunning new look for your home. For those in the Tri-State area (NY, NJ, and PA), be sure to consider JR’S Flooring for your next project. We provide “White-Glove Service” ensuring meticulous attention to detail and a seamless experience for both residential and commercial clients. Remember, proper laminate floor installation is an investment in your home’s beauty and value.
Frequently Asked Questions
Why is it important to acclimate laminate flooring before installation?
Acclimating the laminate flooring is crucial because it allows the material to adjust to the room’s temperature and humidity levels before installation. By storing the unopened boxes in the room where they will be installed for at least 48 to 72 hours, you minimize the risk of expansion or contraction after the flooring is installed. This prevents issues like gaps between planks and ensures a snug, professional-looking fit. Failing to acclimate the flooring can lead to warping or buckling, compromising the appearance and longevity of the floor.
What type of underlayment should I choose for my laminate floor?
The choice of underlayment depends on several factors, including the subfloor type and specific needs. Foam underlayment is a popular and affordable option. Cork underlayment offers excellent sound insulation and is a sustainable choice. Combination underlayments include a moisture barrier, making them suitable for areas prone to dampness, such as basements. Consider factors such as thickness, moisture resistance, sound rating (IIC), and subfloor compatibility to make the best decision for your situation. Consulting the manufacturer’s recommendations is also advisable.
How do I prevent chipping when cutting laminate planks?
Preventing chipping while cutting laminate planks is essential for achieving clean, professional-looking edges. When using a jigsaw, cut with the decorative side facing up. Conversely, when using a circular saw, cut with the decorative side facing down. Applying painter’s tape along the cut line can also minimize splintering. Scoring the cut line with a utility knife before sawing creates a cleaner edge. Additionally, using a sharp, fine-tooth blade and maintaining a steady feed rate with your saw will help to avoid chipping or cracking.
What are some essential post-installation care tips for laminate floors?
To extend the life and maintain the appearance of your laminate floors, regular cleaning is key. Sweep, dust, or vacuum regularly to remove dirt and debris. Use cleaning products specifically designed for laminate floors, avoiding abrasive cleaners or excessive water. Placing mats and rugs at entryways and using felt pads under furniture legs can prevent scratches and dents. Promptly cleaning up spills and maintaining consistent humidity levels will also contribute to the longevity and beauty of your installed floors.